
Publishing a NuGet
The following guide covers the necessary steps to setup a workflow on your Github repository that will publish your plugin to nuget.org or any feed you like using the PublishVLNuget Github Action.
The guide assumes you already have created an account for GitHub and nuget.org and that you have access to an existing VL GitHub repository.
References
The explained configuration is currently being used for libraries such as:
Feel free to use them as starting points for your own library.
A brief introduction to Github Actions
Github actions are small scripts with a specific purpose, allowing you to automate tasks on your repos. They are actually the building blocks of what's called a workflow : you chain several actions one after the other in your own small script, and decide under which condition the workflow is triggered (a new commit on main, a new tag, etc).
Our action will do the following tasks for you :
- Build your Visual Studio solution, if your plugin has one
- Download a package icon from an external url if you don't want to commit it to your repos every time
- Pack your nuget either using a
nuspecor acsprojfile - Publish it to nuget.org (or any other feed)
An action takes input parameters, listed as key-value pairs. In a workflow script, our action could look like this :
- name: Publish VL Nuget
    uses: vvvv/PublishVLNuget@1.0.43
    with:
    csproj: src\VL.MyLib.csproj
    nuspec: deployment\VL.MyLib.nuspec
    icon-src: https://foo.bar/icon.png
    icon-dst: ./deployment/nugeticon.png
    nuget-key: ${{ secrets.NUGET_KEY }}
For a list of all the input parameters the action can handle, head over to its Github repo.
For more information on Github Actions, check the official documentation.
Preliminary notes
nuspec file
The nuspec file contains your nuget's metadata, such as version, author and dependencies. It also specifies which files should be included in your final package. We recommand putting it in a deployment folder at the root of your repo, but it can be anywhere you like.
For more information on the nuspec file format, check the documentation from Microsoft.
Dependencies
In the nuspec file, make sure you list the nugets needed by your library/project under the dependencies section.
Assets, binaries, help files, etc.
In the nuspec file, make sure you list any assets, dlls, help patches, etc. under the files section.
Version
Your package version should follow the semver specification.
A nuget package can come in two versions, a release version or a pre-release version.
A pre-release package implies that the package is currently under development and things can change drastically from one version to the next. Functionality can also be expected to break or become unstable from time to time.
A release package implies that the package has been properly tested and polished for production. No major breaking changes are expected to happen and stability within the package should be reliable.
If you want to publish a pre-release version of your package you need to instruct nuget.org that this is indeed a pre-release version. To do this you must add the -alpha suffix at the end of your package's version.
csproj file
If your plugin has a csproj file, it can also be used to pack your nuget in place of a nuspec file. For more information, please refer to this section of the Nuget documentation.
If you plan to use it for that purpose, just omit the nuspec input of the Github Action.
Package icon
Our Github Action allows you to specify a package icon from an external source with the icon-src and icon-dst input parameters. That way, you don't have to commit your icon file to your repo. The file will be downloaded and put inside your package each time your workflow runs.
Please note that you have to set the icon-dst input parameter to an already existing folder in your repo. We suggest you simply download it to the root of the repository, like so:
(...)
- name: Publish VL Nuget
    uses: vvvv/PublishVLNuget@1.0.43
    with:
    (...)
    icon-src: https://wwww.url.to/nugeticon.png
    icon-dst: ./nugeticon.png
Using a nuspec file
In your action, set the icon destination to the root of the repo :
(...)
- name: Publish VL Nuget
    uses: vvvv/PublishVLNuget@1.0.43
    with:
    (...)
    icon-src: https://wwww.url.to/nugeticon.png
    icon-dst: ./nugeticon.png
Note : paths in the workflow file are relative to the root of the repo.
Then, in the file section, your nuspec file must reference it from where the action will download it (src attribute) and place it wherever you like (target attribute), making sure target matches where the metadata section expects it.
(...)
    <metadata>
        (...)
        <icon>icon\nugeticon.png</icon>
    </metadata>
    <files>
        (...)
        <file src="..\nugeticon.png" target="icon\">
    </files>
(...)
Note : paths in the nuspec file are relative to where the file itself is placed.
Using a csproj file
You can setup an icon for your project inside Visual Studio. Beware you'll have to specify a path to a file that does not exist yet, since the Action will take care of downloading it later on. This can feel weird since Visual Studio's UI gives your a Browse button for you to pick a file. simply fill the path manually to match the icon-src property of your workflow file.
For instance, your worflow file would look like this:
(...)
- name: Publish VL Nuget
    uses: vvvv/PublishVLNuget@1.0.28
    with:
    csproj: src\Whatever\Whatever.csproj
    icon-src: https://wwww.url.to/nugeticon.png
    icon-dst: ./deployment/nugeticon.png
    nuget-key: ${{ secrets.NUGET_KEY }}
And your Visual Studio configuration like this :
![]()
Using the Action
Getting a nuget.org API key
The following steps will guide you through the nuget.org configuration, before proceeding please make sure you have a working account and are logged-in in nuget.org.
- Click on your user name at the top right
- Click on
API Keysin the menu that pops up - Click on
+ Create - Under
Key Nametype the name of your repository or project, this is going to be the official package name for the world when they typenuget install <YourPackageName> - Under
Package ownermake sure you select the appropriate option depending on your case, if the package should belong to an organization you are part of rather than to you, choose said organization now - Under
Glob Patterntype: * - Click
Create
NOTE: At this point you should see your newly created package listed with a yellow warning message reminding you to copy your key, this is a crucial step as this is the only time you will be able to copy this value.
Click on Copy below your package's description and add it to your repository's secrets. To do so, please refer to this page of the Github documentation. Remember your secret's name, we will use it in the next step when we'll create our workflow file. We suggest you simply call it NUGET_KEY.
Creating the workflow file
Create a new main.yml file in your repository in a .github/workflows directory. Your repo structure should look like this :
├── .github
│   └── workflows
│       └── main.yml
├── deployment
│   ├── VL.MyLib.nuspec
├── help
│   └── Basics
│       ├── HowTo Foo.vl
│       └── HowTo Bar.vl
├── src
│   └── MyLib
│       ├── Baz.cs
│       ├── MyLib.csproj
│       └── MyLib.sln
├── README.md
└── VL.Whatever.vl
Before using PublishVLNuget, you need to add a few pre-existing other actions that are needed by it. So in your main.yml file, paste the following :
name: push_nuget

# on push on main
on:
  push:
    branches:
      - main
    paths-ignore:
      - README.md

jobs:
  build:
    runs-on: windows-latest
    steps:
    - name: Git Checkout
      uses: actions/checkout@master

    - name: Setup MSBuild.exe
      uses: microsoft/setup-msbuild@v2

    - name: Setup Nuget.exe
      uses: nuget/setup-nuget@v2.0.0
The on section describes under which condition the workflow is triggered. Here, we specify that when there's a new commit on main except if it's on README.md, we trigger the workflow.
Then, in our job, we add three actions :
actions/checkoutmake sure to use the latest version of the git checkout actionmicrosoft/setup-msbuildmakes sure our action can usemsbuild.exeto build your solution- As a consequence, if your plugin does not have a Visual Studio solution, you can omit this
nuget/setup-nugetinstallsnuget.exe. We need it in our action to pack and push your plugin to nuget.org.
Now that everything is setup, we can add our action and fill its parameters accordingly.
- name: Publish VL Nuget
    uses: vvvv/PublishVLNuget@1.0.43
    with:
    csproj: src\VL.MyLib.csproj
    nuspec: deployment\VL.MyLib.nuspec
    icon-src: https://foo.bar/nugeticon.png
    icon-dst: ./nugeticon.png
    nuget-key: ${{ secrets.NUGET_KEY }}
NOTE : paths in the workflow file are relative to the root of your repo!
Wonder what is that {{ secrets.NUGET_KEY }}? Check Getting a Nuget API Key.
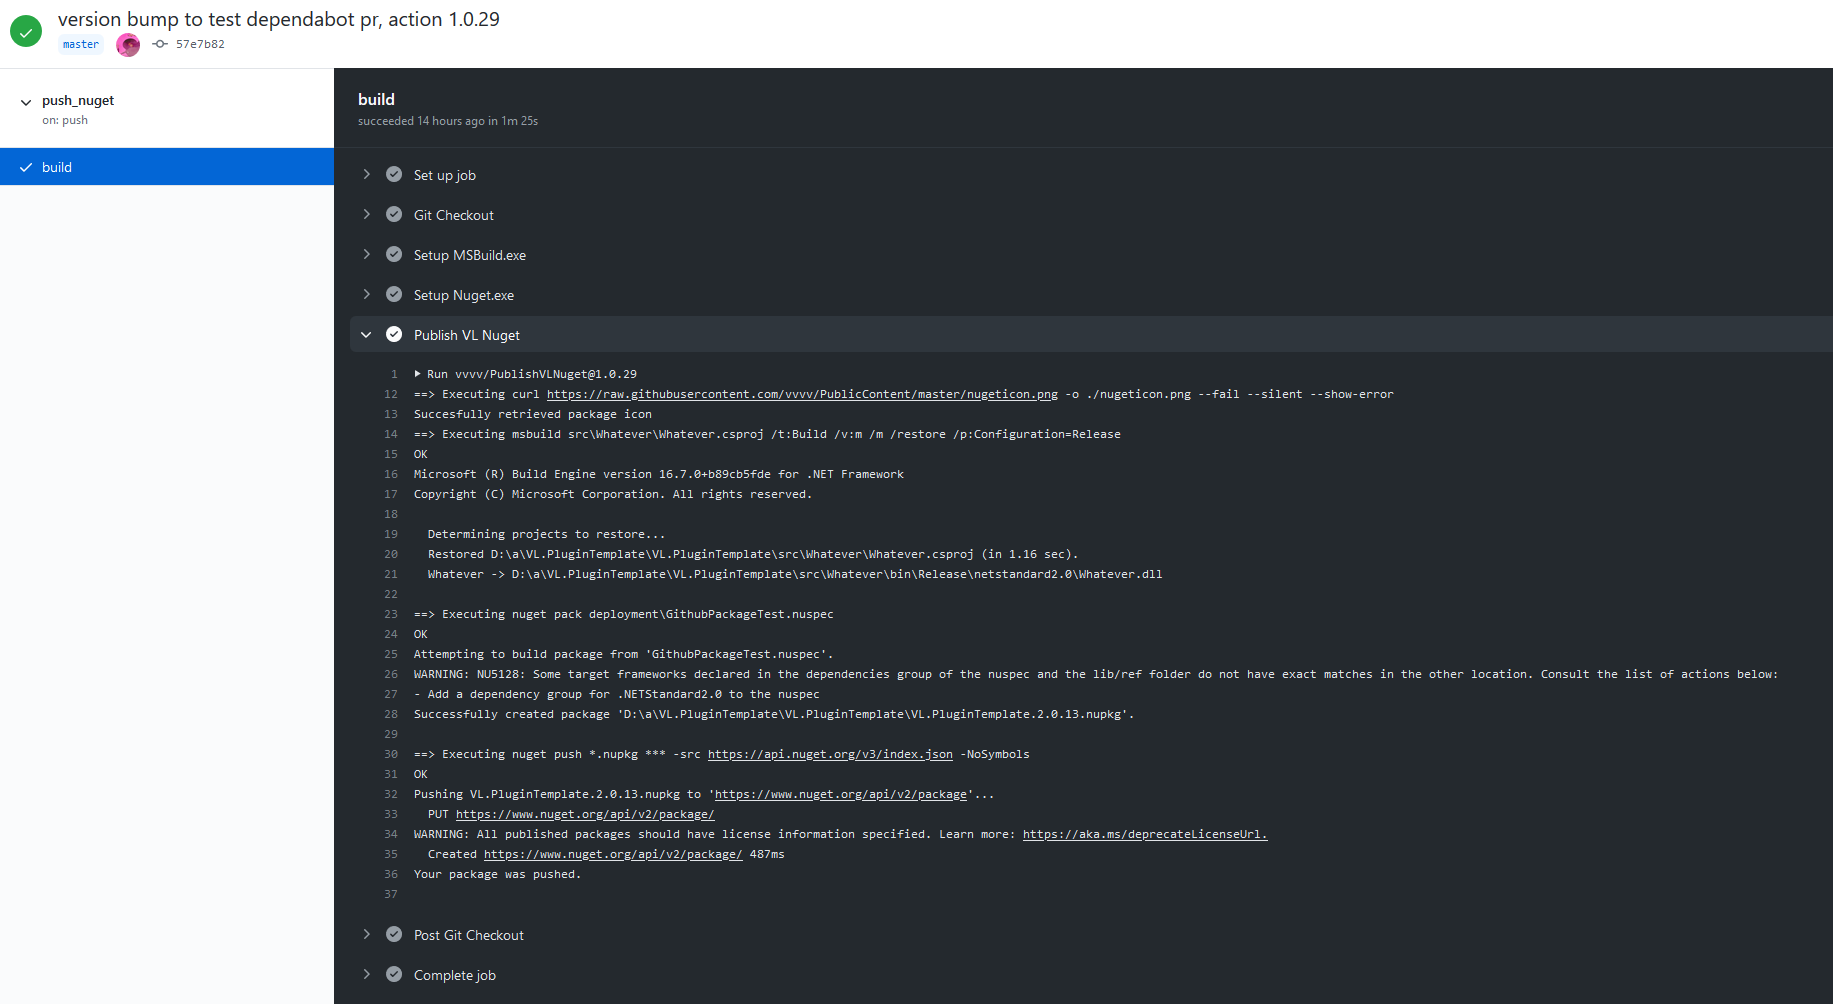
Push!
You can now push to your main branch and trigger a new deployment of your plugin. Make sure that you bump your plugin's version in your nuspec or csproj file, otherwise nuget.org (or any feed you're using) will refuse your plugin.
Head over to the Action section of your repo to monitor your worflow run in real time. If errors occur during the workflow run, they'll show up here.
Categorize the pack
In order for your public pack on nuget.org to show up in the package browser make sure:
- Your pack has a tag "VL"
- You add your pack to the list of curated libraries, which defines the categories used in the browser. Note: A NuGet can appear in multiple categories!